This article has been authored by Jared Leckie.
A new film lab service has been recently released in Toronto for film photographers – and it’s being overlooked. This new service is called ‘LOG’ scanning for film photographs which is now offered at Graination. While this type of scanning is part of the motion picture world – Graination is the first in Canada to offer it for film photographers. So what is a LOG scan? It’s the scan file that is generated at the first stage of the scanning process without any further digital editing from the scanner software. LOG scan quality is exceedingly higher than standard scans given as default. This includes a rich and flexible tonal range, which means that the highlights, midtones and shadows are wonderfully preserved. I want to emphasize that highlights are particularly a ‘night and day’ difference with LOG scans. I will illustrate this with the comparison images further below in this article. As a note: I want to clarify early in this article that standard scans can of course still be beautiful, but in general you will always get a better quality scan with LOG – particularly under more challenging lighting conditions. While it’s of course understood that film is great at handling highlights – it really gets properly preserved with LOG scans.
Before I compare let me give you some brief info on how it works after you shoot a roll with your film camera – particularly for those reading that are just getting into film photography. Once you’ve shot a roll with your film camera your next step is to take it to a film lab for development and scanning. When you go to a film lab generally you have two popular options to choose from which are both from Fuji scanners being the ‘Frontier’ and the ‘Noritsu’ scanner. There are other film lab scanners, but these are by far the two most popular scanners at film labs. Both of these scanners have their PROS and CONs – at a quick top-level comparison Frontier generally has more visually pleasing colour tones, but faults in most other aspects versus Noritsu.
NOTE ON NORITSU SCANS – *Oversharpening caution – Standard Noritsu scans from film labs tend to be over-sharpened. You will especially notice this with fabrics or other similar gridlike patterns. This of course can be requested to be minimized – so if you prefer standard scans then it is recommended to request a lowering of the sharpness during scanning.
Now when you get standard scans from the film lab these scans will be given to you processed for colour tones, shadow/highlight detail, sharpness and so on – this means essentially that these standard scans are ready to go for sharing. However, this means your scan files have heavy degradation.
A degraded image file means that what you see in the final result film scan has very little latitude for colour and shadow/highlight density correction on your end. This is a major issue and needs to be fully understood.
Furthermore, colours with the default/standard processed quality with both scanners are usually sporadic and ‘wonky’ along with colour shifts per image – this leads to frustrating consistency issues especially when comparing as image arrays.
Now the answer may be ‘well just use adjustments to balance out the images!” – That type of statement misses the point that there’s virtually no latitude to work with….meaning when you try to adjust to balance the images across an array (side-by-side) then they get significantly worse for quality. To put it simply you can’t adjust highlights if the highlight detail is not there to begin with and the highlight details are lost with standard scans.
Also, the colours shift terribly with any type of adjustment. I really want to emphasize this because as we all know trying to correct colour on degraded image is just like trying to white balance a heavily processed JPG file…..terrible colours and results.
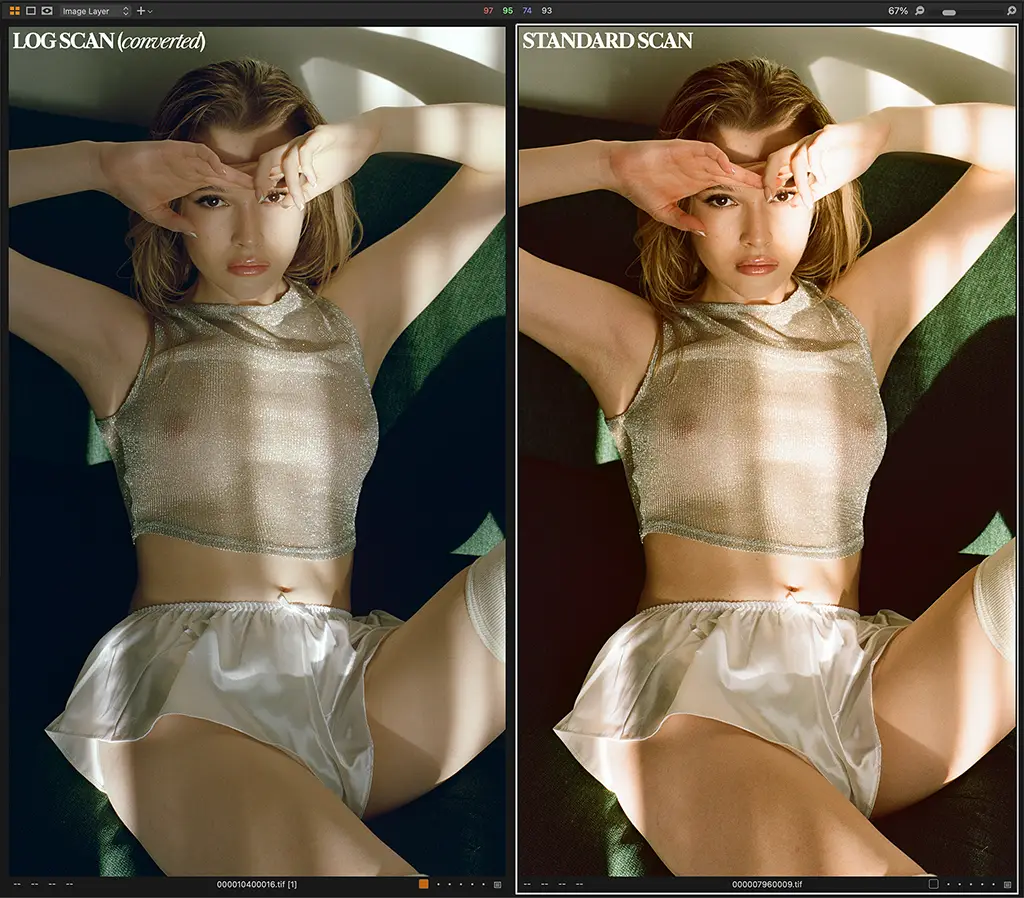
The best way to further explain is comparison images. Lets take a look at the images below. The image on the right is a standard default scan while the image on the left is the LOG scan with the conversion done through Capture One Pro.
Notice how the colours in the default scan are extremely saturated along with highlight detail that is very poorly rendered. In fact, the highlights are virtually gone to paper white of 255 highlight levels with no correctional latitude. If I try to pull back those highlights it results in ‘wrecked’ tones – no detail to work with. This is quite upsetting to say the least.
Film scan photographs below of model Sasha Shurachka were shot on Hasselblad (December 19th 2023) using medium format film for ‘Aurélie’ – a project that is not yet launched…
COMPARISONS Challenging lighting conditions
1A – Direct sunlight on model through curtains (no other light source)
LOG SCAN (Converted through Capture One Pro) VERSUS THE STANDARD SCAN
Now this lighting scenario is indeed a challenging one with strong direct highlights streaming through the curtains with no other light sources. However, you can see with the LOG scan that the inherent film quality detail is all captured – it’s just simply lost(degradation) with a standard scan due to the latter stages of the scanner’s software. Furthermore and as mentioned previously – saturation and colour shifts are ‘out of whack’ to say the least. Once again, I want to point out that the both Frontier/Noritsu do pretty well for scans overall in easier lighting scenarios which I plan to make a second article about – so the image on the right shouldn’t be recognized as a ‘standard look’. However, even when the Frontier/Noritsu scanner gives good standard scans overall you will still get better quality with LOG scans. One of the key things to mention though is that LOG requires significantly more time to convert on your end – so this is a major issue for many film photographers particularly in the higher volume category. This being said it may not be suitable for you and perhaps it’s best to request a custom profile request for your batch of film rolls.
LOG SCAN (Converted through Capture One Pro) VERSUS THE DEFAULT LOG SCAN
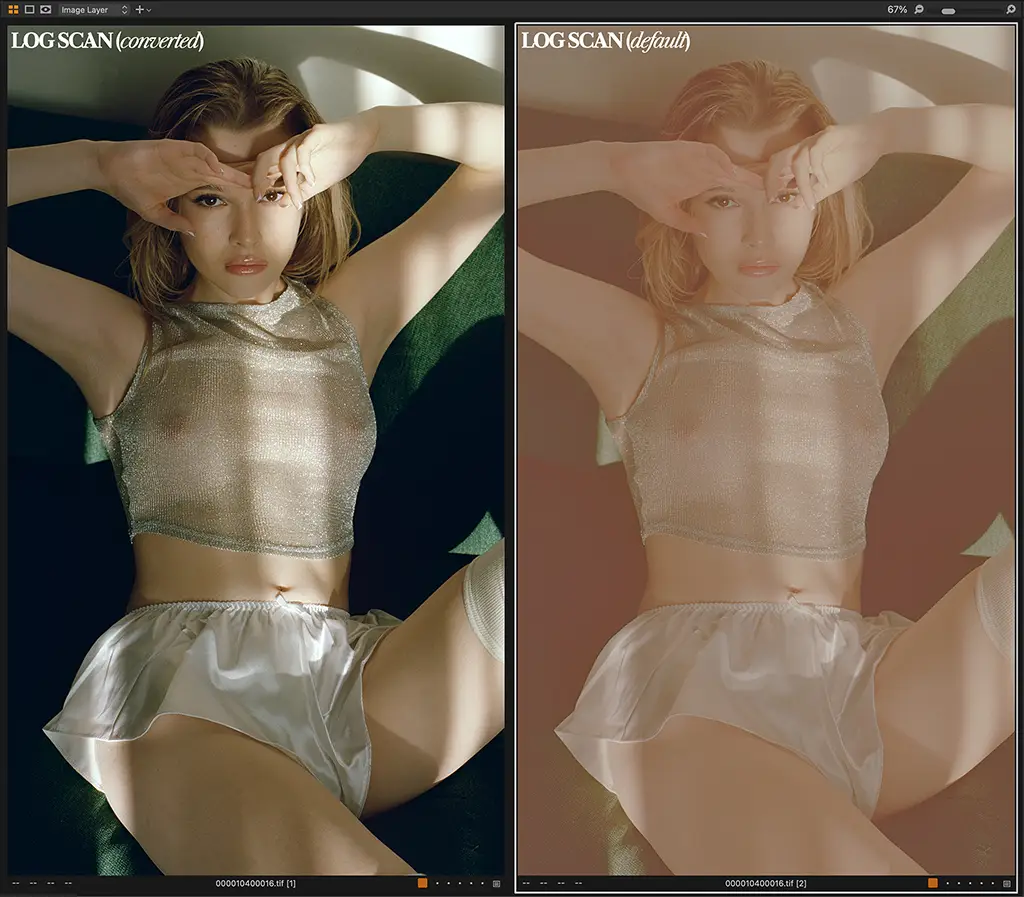
LOG SCAN (Converted through Capture One Pro) VERSUS THE DEFAULT STANDARD SCAN
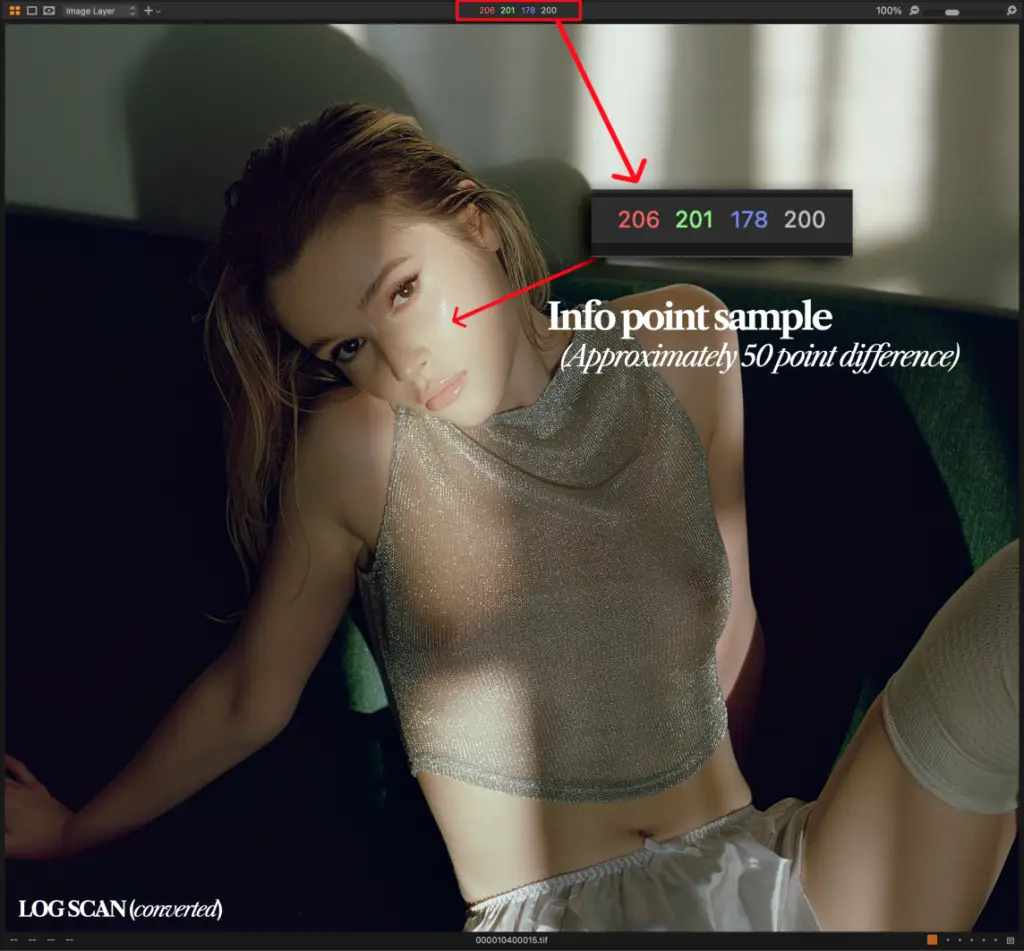
Another comparison below with an example of even more direct light on her face – you can clearly see the extreme loss of highlight detail with the standard scan. The degradation is so poor that it’s virtually paper white as shown with the info point sample taken in Capture One Pro. This clarifies that film itself does actually capture significantly more detail in highlights than you may expect – many photographers are simply unaware of how much highlight detail is lost with scanner software processing. The standard scan is of course unacceptable and clearly can not be corrected. Experienced photographers are of course aware that as soon as info point levels reach a certain point – that’s how it will remain…
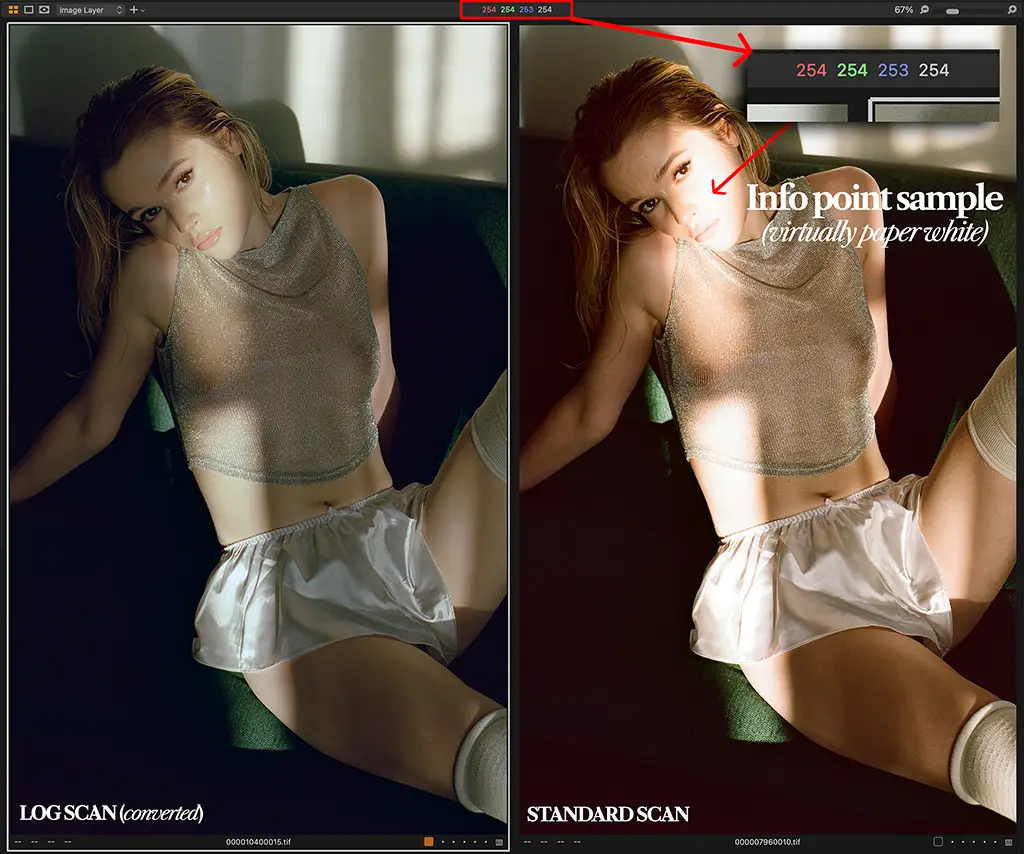
When we take an info point sample from the same area we can see approximately a 50 point different with the log file. This is a striking comparison and really shows that an extensive amount of detail is lost.
